

I’ve always like the effect applied to water textures in the Quake1/2 engine/games and, as a Duke Nukem 3d/Build modder, I was envious of the engine-generated warping animation available in ZDoom. :) It looks good and it’s pretty time-saving, since you don’t have to animate the texture by yourself. I wouldn’t be myself if I’d give up on the idea, so I’ve decided to work out a method for a nice water animation than can be made quite quickly and without too much fuss. Unfortunately, this can’t be really done well and quickly just inside Photoshop, but we’ll get to that.
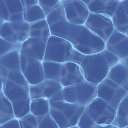
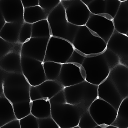
Here’s our procedurally-generated test patient
They call it “le Displacement”
With the goal of rippling or warping water, I’ve turned my attention to displacement/distortion effects. Take a peek at filters → distort to see what’s available. However, before we proceed further, there’s some stuff you have to keep in mind!
- Photoshop is designed for static images, so the animation possibilities are quite limited! Since the controls of the filters control only the appearance, there’s no controls for animation at all. This means you can only copy your raw image another time, and apply the same filter again, hoping the random seed generator will be in your favor. ;)
- Edges – since you’re working on a texture that has to be tileable, and most of the filters (if not all of them) leave you with non-tileable results. Quite a pain in the arse if you ask me, there’s one solution that can work in a pinch – duplicate the current frame as a new layer, offset the layer below by half of it’s size with filters → other → offset, and create a mask to the layer above, to make it visible only on the seams.
- Aliasing – distortion filters work by transforming the source image – this may cause aliasing and some jaggyness/harshness of the picture. The best way to counter this, is to work at a larger size. If you’re source image is larger, then after applying your filters, you can scale it down to your desired size, and lose the jaggynnes with resampling. If you want to apply the filters to an already created texture, I recommend you scale it twice or quadruple the size without any resampling and then proceed with the filters.
The left sized is scaled down from 4x while the right one has the filter applied in native size
While Photoshop offers a nice list, only few of the distortion filters are useful to us – displace, ocean ripple and wave. Ripple and glass came close, but they have no randomness, so you’ll always end up with a still frame. You can animate them by altering their parameters, but trust me, that won’t give you the effect you’re looking for. Let’s check out wave first.
And that’s the problem. Wave would absolutely do the trick, since it’s the effect we’re aiming for, but the lack of possibility of creating of in-between frames between two states kills it. Either you have to set it up that the effect is barely visible, or it gets twitchy. I’ve used 10% horizontal and vertical scale in this case, with such a set up it’s almost tileable if you have the “wrap around” checkbox ticked.

And here’s the ocean ripple. Not bad, but that’s not exactly what I’ve had in mind, plus it’s not as fluid as I’d like, but that’s due to already mentioned lack of animation possibility.
Displacement filter
The displacement filter displaces, duh! :P It’s supposed to make your current layer appear to look conformed to another image, surface, etc. What makes it different from the others, is that you have to provide an image-file (saved in grayscale .psd format), as the “form” for distorting the desired image. In our case we need something that will make our “wave” distortion. How do I get it? I guess the easiest way is to generate it procedurally. I’ve used the Caustics Generator software. The basic functionality of the free edition is enough, however it’s not allowed for commercial use and points a bit of a middle finger to you when you’d like to get the frames of the generated caustic outside of this program, but you can get around it plus I don’t think there’s anybody doing commercial Build engine modding today…
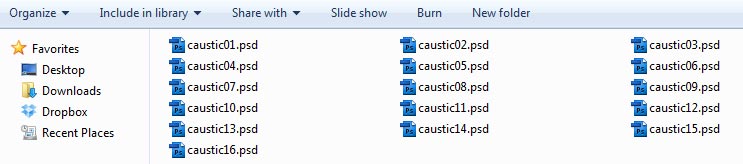
Okay, so 16 alt + printscreens and pastes, single rectangular marquee selection and one image → crop later, here’s our generated caustic, which will serve as the displacement map:
Pretty neat, give it a recolor and you can use it as a water texture by itself if you like! Let’s get it to work as a displacement map for our actual water texture – tediousness ensues! Not that bad actually, but it takes some time.
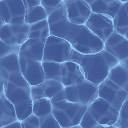
Oh the harmony!
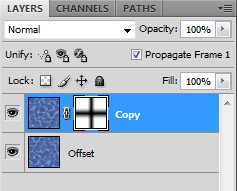
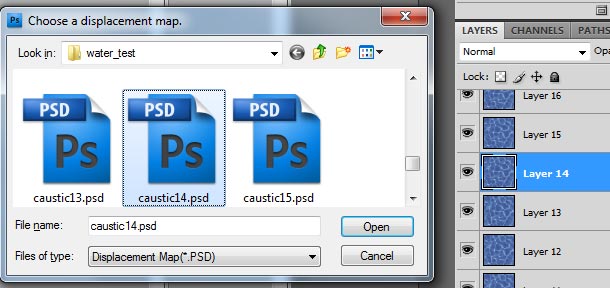
Next up, open the document with your texture, and duplicate the layer that contains it – as many layers as there are frames in the caustic/displacement map. Instead of actually duplicating the layers, I recommend you select your texture with ctrl + a, copy and then paste it with ctrl+v in rapid succession to save some time. Each copy will be named layer #, so it gives away if you have enough of them. Afterwards, select each layer and apply displace filter with the corresponding .PSD file. Make sure that you have the wrap around checkbox checked and before you proceed with all your layers, try different settings on one first. I’ve used 100 pixels for both horizontal and vertical values. If my displacement maps had less “flat space”, I could safely lower the numbers.
Keeping the process organized will reduce the headaches to a minimum!
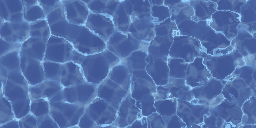
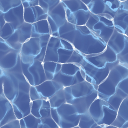
Once I’ve made all the frames and scaled them to desired frames, this is how it looks:

It’s more of a ripple, than wavy effect, but I like it. The result all depends on the displacement map you provide – for example, I could overlay another, wider and more blurry, caustic on the already rendered one, but with the frame by frame method, such actions make the whole process more time consuming… With a little more going on in the displacement map, I lowered the displacement amount for a smoother look and I’ve added the caustic frames on top, with the screen blending mode, here’s the result:
This is tiresome, is there another way?
I think this method is pretty easy, but still, it’s time consuming and there’s plenty of “menial work” ;). As I’ve already wrote in another article, Photoshop is not the tool for everything. The second part of this article will cover the faster method and will introduce you to AfterEffects as well, check it out here!
Leave a Reply