This was supposed to be a quick introduction to classic art tools, but it’s still pretty long due to the amount of material! ;) I’m writing down most common tools/mediums, my opinion and experience of it and sometimes even some brand recommendations. Highly recommend if you’re getting started, and jumping over from computer-made art (I actually did, few years ago).
This is a very broad and subjective subject, so in the end, you’re best off experimenting and trying out stuff on your own! Remember that the tools serve you and your vision, and will almost never make a picture for you! You’re the master of them, and your skills lie at the core. Also, I’m an advocate of the approach of looking for the items with best “price-to-quality” ratio – both buying very cheap and expensive might not be the best choice. Personally, I’ve learned the hard way, that expensive equipment doesn’t improve your skill, so keep that in mind. If you’re ready, read on!
“Analogue” tools ;)
This is a big one. It’s not just there are a lot different techniques, there’s a diverse set of tools for each one! I’m still in the process of exploring the field myself and I think I’ve barely scratched the surface. :) I’ll try to keep it as condensed as possible, and here’s some links for navigation.
Paper
This may seem basic, but it’s worth to mention.
- Size: this strictly depends on what you need and/or trying to accomplish. For someone working usually on small formats, big papers may be daunting at first, however, they allow to work more free form, and paint like, and may actually require less detail for a good-looking piece! Then again, highly detailed, big works have potential to be really astonishing! Match the size to your needs, especially paper for doing sketches (which build up your workshop) – those should be best suited to the environment you’re working on – either your desk, or maybe smaller formats for mobility, if you’re sketching on the commute or a cafe. (Recommended for great practice!)
- Texture: Depends on your preference. Textured paper adds some extra “abstract detail” in your work for more interest, but you may prefer no texture for the smooth pencil renderings.
- Grammature or thickness in the layman’s terms: Depends on the purpose and last ability of the drawing. In general, I consider 80g/m² to be a strict minimum – 80-100g/m² are good for sketching and 120-180g/m² make up a good general drawing paper, I prefer thicker paper for larger formats, since it’s more sturdy – it’s easier to damage or fold thinner paper. If you plan on using ink wash, or watercolor, you need even thicker paper so it can absorb the water without folding – thicker paper also shortens the dyring time. Watercolor paper is made for this purpose and usually, it’s 200-300g/m² or even thicker, for example 600g/m². If you really need a solid paper, even for a pencil drawing, I recommend watercolor paper.
- Acid-free! Always use acid-free paper! Most of the art papers are acid free – this will make sure your works not yellow out over the time.
From personal experience: I recommend Daler Rowney or Fabriano (Italian made) papers. Canson offers high quality products too, but it’s a bit more recognized brand – you might get “more bang for your buck” from other manufacturers. Of course, proper quality paper is a bit more costly – if you need to make a lot of practice drawings, or prelineary sketches, buy cheaper paper, like printer paper or newsprint. Those are usually thinner and may not be acid-free, but those serve to build your workshop, or just to get an idea quickly out of your head, so you usually don’t care if they last or not. If you’re looking for tinted paper, I recommend Canson Iris 180g paper for it’s good price/quality/size ratio.
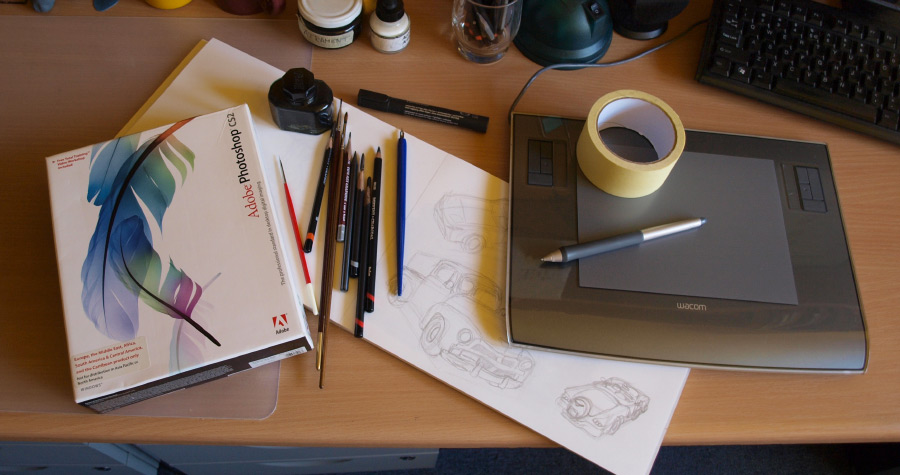
Drawing tools
Graphite, charcoal
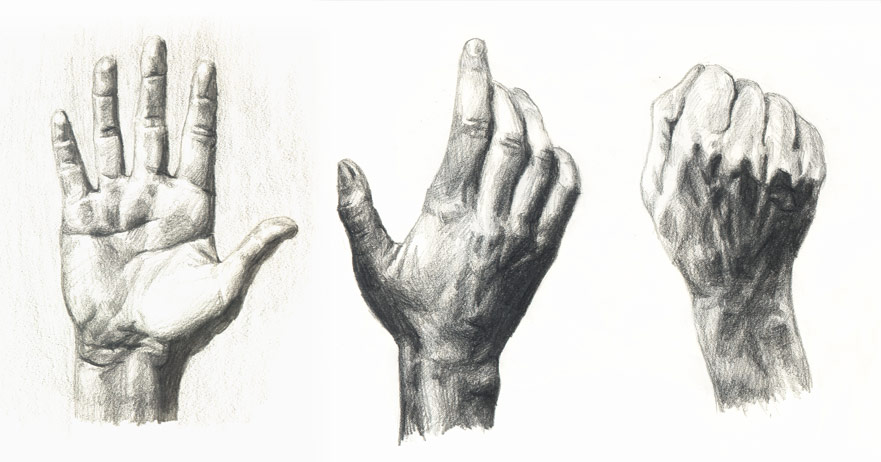
Those are the standard black & white tools, very useful for sketches as well as renderings. Charcoal offer very intense blacks and lack the shine of the graphite, they’re pretty dusty, so you have to watch out to keep your drawings clean, and fix them with adhesive/fixative once you’re done, to prevent any damage. (This may also bring out the texture of the medium, so keep this in mind). Charcoal is a bit harder to work with than pencils, in my opinion, but you can be precise and smooth with them once you learn to handle them. :) Charcoals come in lighter and darker variant and graphite pencils have different hardness – from H (hard) pencils, which leave a lighter mark and keep their sharpness longer, to B (soft) pencils, which leave a darker and a smoother mark. I usually work with 4b, 8b, and 2h pencils for light sketching. Koh-i-noor pencils are pretty good, Derwent pencils work for me best so far, with Derwent Sketching 4B being my recent favourite. I’m not a fan of mechanical pencils, but some people like them very much – they’re great for small details since you don’t have to worry about sharpening. Charcoal from those brands works okay too, but I’m not an expert on charcoal. Conte has a pretty big following as well. Here’s some of my pencil studies made with a 4B pencil – notice the texture of paper coming through.
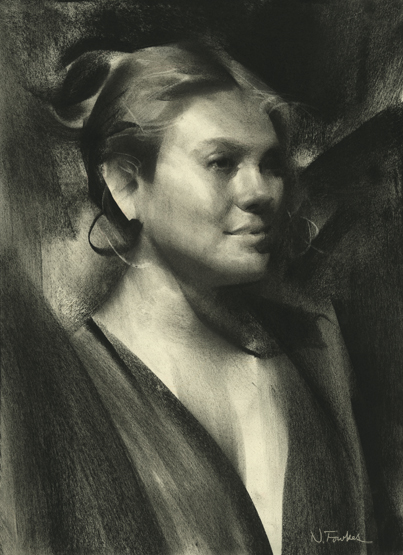
Besides the lightness/hardness, you can get both charcoal and graphite in pencils and sticks/blocks. The normal pencils don’t muck your hands, if you’re a freak about it :P and are easier to sharpen them to a nice tip for details. Blocks are radically different to work with – their shape forces you to think and work differently, and can add an interesting “geometric” quality to a drawing. I prefer working with normal pencils, but I recommend you try out the blocks – they’re great for working on a drawing in an “all-at-once” approach – you work on the whole image at once, starting with broad, but light strokes, big planes of light color, and slowly going more detailed and darker. As an example of an detailed drawing, where you can see that “geometric” strokes, here’s a portrait drawn by Nathan Fowkes, he’s an concept artist for Dreamworks (And others!) and creates awesome block-charcoal drawings!
Oops, wrong line, what should I do? Don’t worry about it, I’m sure all of you know the traditional vinyl eraser – it’s good for erasing a more precise detail, but it tends to leave a mess and it’s not suited for charcoal. I prefer kneaded eraser, since it works with more media, can be quickly and easily cleaned up, and, since it’s a soft mass, can be formed into a spike, or a wedge for some specific erasing.
Inking tools
Let’s venture into the world of comics! ;) Well, inks are not an comic-exclusive medium, but they’re mainly associated with it. There are three main tools you can use for inking your drawings – each is different, and I recommend you try each one.
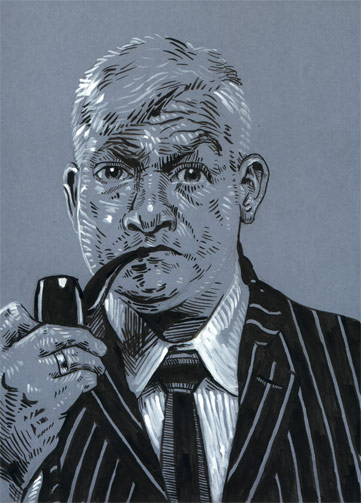
- Markers/marker pen/ink pen: Marker pens create a very uniform line/strokes, and have little brush stroke variety, they are very precise though. One may say they’re not as expressive as other tools, but a lot of artist prefer them. They’re great if you need a lot of small, uniform detail (in a background of a comic panel for example). Since they’re less free-form, they’re available in different thickness. For me, 0.4mm works best for normal lines, and 0.2 for thin ones. I’ve used different brands of markers, including Staedler, Faber-Castell and Sakura/Pigma and they’ve all worked well.
- Nib pen: those come in a lot of varieties – some are just a grip for your hand which hold a nib (I work with those), some are a complete assembly – those can either require dipping them in ink or use interchangeable ink cartridges. The pen is somewhere in between the markers and the brushes – it has more variety in its line than a marker, but less than a brush – this depends on the kind of nib you’re using and it’s softness, the nibs can be more or less elastic – that why I recommend a generic nib holder, so you can try various ones and see what works best for you! The one I prefer working with are actually writing nibs!
- Brushes: those are my favorite, but they’re hardest to control. Brushes offer most variety in the strokes, and this really allows you to add a lot of extra style and flavor to your inking. Also, you can cover “most ground” with a brush, since it’s possible to create thick strokes using the same brush, so may not have as a big need for switching to a “larger” tool, as may be the case with the other tools. When looking for an inking brush, make sure it has a sharp tip and a general smooth shape (no loose hairs sticking out) and it’s very springy and elastic. From my experience, synthetic works best. It doesn’t have to be a small brush, since you can work with just the tip, but it usually makes things easier. I’m usually using an Windsor & Newton University 0, or 00 brush for inking.
Here’s a nib pen study:

And a brush drawing: (using a single 0 brush)
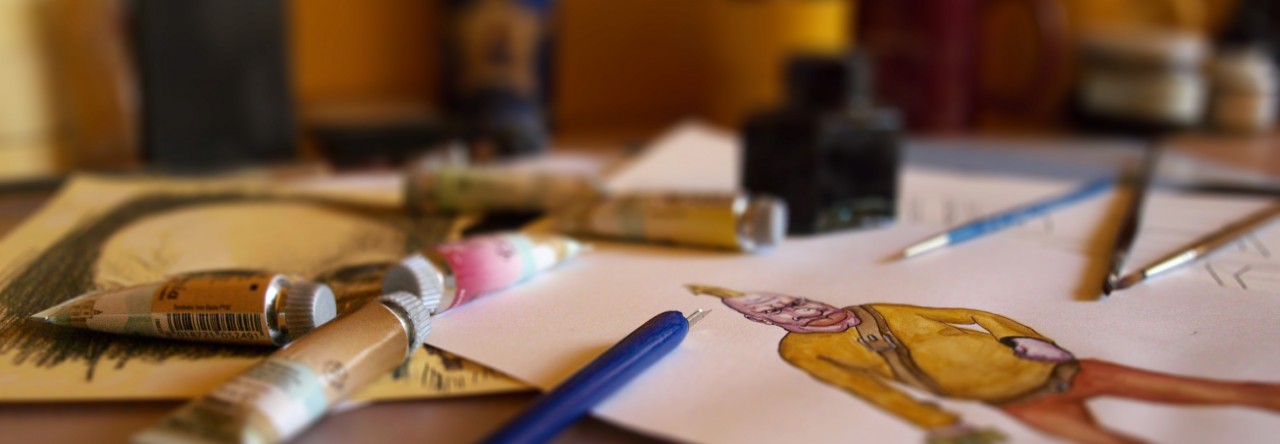
What about the inks? Use india ink, not normal ink. The main difference is, that india ink is water-proof while the plain, writing ink is not. As for the inks them self, you can use almost every black ink, however the cheap ones maybe not-uniform in their consistency, or watery ( You can leave them open and let them dry for a bit and then shake them so they’ll get overally thicker). I can’t recommend any color inks, since I’m not happy with the ones I’ve tried so far – remember that the color inks usually are not fully opaque! Also, remember to wash thoroughly your brush after finishing your work, I like to do some even during the process – just to make sure the ink won’t dry and ruin your brush.
Let’s add some colour
Colored pencils
Crayons! This is a pretty much the same deal as the graphite pencils, except in colour. ;) They have hardness too, but it’s rarely mentioned in the product name/description, unfortunately – you have to try them out on your own. Harder ones will be sharper for a longer time and leave lighter marks, while the soft ones will do the opposite. Soft ones may be prone to smudging too. Standard crayons are pretty hard to blend, you have to keep your strokes of different colors light and do it gradually over one area. You can also find watercolor pencils, which are water-soluble – you can blend them with water, they behave like watercolor paint. I recommend Derwent and Faber Castell color pencils, Prismacolor pencils have a huge following but they’re hard to get where I live – give them a try if they’re available to you – they’re available both harder and softer/smoother.
Pastels
Pastels are quite interesting, though they may be hard to use. They come in two main variants:
- Soft/dry pastels: They have more pigment and less binder then others – this results in a pretty chalky medium (It’s colors are a lot more intensive that chalk, though), it works pretty similar to charcoal, and those usually come in blocks, however pencils are available too. Dry pastels are very blendable and require a fixative to prevent smudging, just like charcoal. They also they to leave behind a lot of dust, so you have to watch to not mess around your workspace in you’re working at home and to not smudge your drawings. It’s harder to do some actual detail with traditional block pastels, but they’re nice to give a kind of “impressionistic” quality to the work.
- Oil pastels: Those use oil as a binder, and this results with very solid strokes with no dust, bit they’re next to impossible to blend. They also have less texture and a bit of shine to them. Due to the nature of the binder (being the same as in oil paints), those can be thinned and blended with turpentine.
Paint
Paints are available in variety of types:
- Watercolor: simplest of the paints, since they’re pretty much just water and pigment. Watercolors are best known for their transparency and being non-opaque, which may take a while to use to. They require a lot of water, so thick paper is necessary. Watercolors take a while to get used to, but they can give very artistic results, and are a good way for coloring inked drawings. They’re non-opaque, so they leave almost no-room for mistakes, so you have to think about what you’re doing, but they also allow you to paint in layers in an interesting way. Keep in mind you can get your paper wet with water first and then paint, for more interesting effects! Highly recommended medium, but it may take a lot of trial and error to learn how to use it. Watercolor paints come in tubes and blocks, I personally prefer tubes, I feel more in control of mixing and amount of color.
- Gouache or poster paint: similar to watercolor, except it’s opaque.
- Oil paints: From renaissance to today, oil paints are still in use. They’re the longest drying paint of all, and the most blend able, best if you’re looking for smoothness. Instead of water, you use oil or turpentine to thin them or blend them. There are a lot of ways to work with them, you can paint a picture in one sitting, or do it gradually in layers, just remember that later layers will require more oil than the earlier ones to prevent cracking. Oil paints can also be used for glazing and impasto techniques. While these paints may seem like a professional medium, they are pretty good to start with, since they leave a lot of room and time for correcting potential mistakes.
- Acrylic: The “modern” paint, created in XX century using acrylic resin as it’s binder. Acrylic paints are water-soluble and become water-proof after drying, certain techniques and/or extra added media to this paint allow it to be uses in different ways – both an oil paint and watercolor look can be achieved. Acrylics dry very quickly compared to other paints, that’s why they’re pretty often used in concept and “production” art. General opinions say that acrylics and oils shouldn’t be used together, but there are examples of successful use. (Some of the works of Mark Rothko for example).
What to paint with? Whatever you wish. :) From your fingers, twigs and whatever else you wish! In general, two tried and true tools are used – brushed and palette knives. This really depends on you, so I’m afraid there’s no other way than to try for yourself. While a cheap, set of plastic palette knifes might be workable at first, cheap brushes are usually low quality and last for very short. Brushes come in variety of sizes, shapes and bristle types. Read this for an introduction.
Conclusion: Start looking!
I think that’s a pretty good introduction, I still feel I’ve barely scratched the surface of the topic. I hope you’re a little less lost, if you’re starting out, however if you really want to get into art, there’s no better way than to try everything for yourself. Here’s some stuff if you’d like some extra info:
- Wikipedia on oil painting – While the Wikipedia is a general knowledge site, the articles about art media/techniques and tools are pretty good and serve well as a general introduction – check articles about other media too.
- Stan Prokopenko’s drawing supplies – This is a video about drawing tools, geared more towards an academic, fine-art approach. Stan hosts a lot of awesome tutorials, too!
- Mark Crilley’s art supplies – Mark Crilley is an illustrator and comic book artist, and this is an interesting video about what he uses and why!
Leave a Reply